


ATLET
Daniel Timothy Wenas: Perjalanan Karir dari SMA Hingga Menjadi Pemain Profesional Basket
Pendahuluan Daniel Timothy Wenas adalah salah satu nama pemain basket muda berbakat yang mulai dikenal…

ATLET
Nathania Claresta Orville: Atlet Basket Putri Asli Jambi yang Berjaya Membawa Medali Emas
Pendahuluan Nathania Claresta Orville Indonesia dikenal sebagai negara yang kaya akan keberagaman budaya dan sumber…
ATLET
Ayu Sriartha: Pilar Utama Timnas Basket Indonesia di SEA Games
Pendahuluan Ayu Sriartha Basket adalah salah satu cabang olahraga yang cukup populer di Indonesia dan…

ATLET
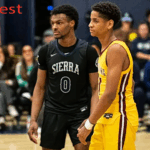
Kiyan Anthony dan Bronny James: Mengikuti Jejak Ayah Mereka dalam Dunia Basket
Pendahuluan Kiyan Anthony dan Bronny James Dalam dunia olahraga, kisah keluarga yang menonjol sering kali…

ATLET
RJ Barrett: Pemain Serba Bisa yang Dipilih New York Knicks dan Pernah Satu Tim dengan Zion
Pendahuluan RJ Barrett merupakan salah satu bintang muda potensial di dunia bola basket NBA. Pemain…

ATLET
Curahan Hati Tyrese Haliburton Setelah Menjalani Operasi Achilles
Pendahuluan Curahan Hati Tyrese Haliburton Setelah Menjalani Operasi Achilles. Pada bulan tertentu, dunia basket dikejutkan…

ATLET
Maria Alexandrovna Stepanova: Bintang Basket Profesional dan Olimpiade Rusia
Pendahuluan Maria Alexandrovna Stepanova adalah salah satu pemain basket profesional paling terkenal dari Rusia, yang…

ATLET
Małgorzata Dydek: Legenda Basket Wanita dari Polandia dan Amerika Serikat
Pendahuluan Małgorzata Dydek, yang lebih dikenal dengan panggilan Margo Dydek, adalah salah satu pemain basket…

ATLET
Earvin Johnson Jr.: Legenda yang Dianggap Sebagai Pemain Point Guard Terbaik Sepanjang Masa
Pendahuluan Earvin Johnson Jr Dalam dunia basket profesional, beberapa nama telah melekat sebagai legenda yang…

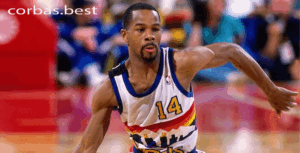
ATLET
Carmelo Anthony Dipilih oleh Denver Nuggets di Tempat Ketiga pada Draft NBA 2003
Pendahukluan Carmelo Anthony, salah satu pemain paling berpengaruh dan berbakat dalam sejarah NBA, memulai perjalanan…